
5 Ways to Take Better Cellphone Photos
Entrepreneur and photographer Chase Jarvis once stated, “the best camera is the one that’s with you,” and as our phones have become an ever-present aspect of our life, I thought I’d put together this list of some of my favorite tips and tricks to help you get the most out of using that one camera that is always with you!
Check these out and comment below with any awesome images you create!
1. Adjust your Exposure
Just like a “professional” camera, phones that have built-in camera functions allow for you to decrease or increase your exposure, making your photo lighter or darker. If you’re using the built-in iPhone camera you’ll be able to tap and hold any part of your scene and drag your finger up and down using the sun icon to choose how light or dark your photo is.
This can be quite useful when you are taking photos that have both very bright light and very dark shadows.
Sometimes your phone will automatically set the exposure for the brightest part of your photo, but if the subject of your image is mostly in the shade, using this exposure adjustment tool you can make your photo brighter to show off your subject!
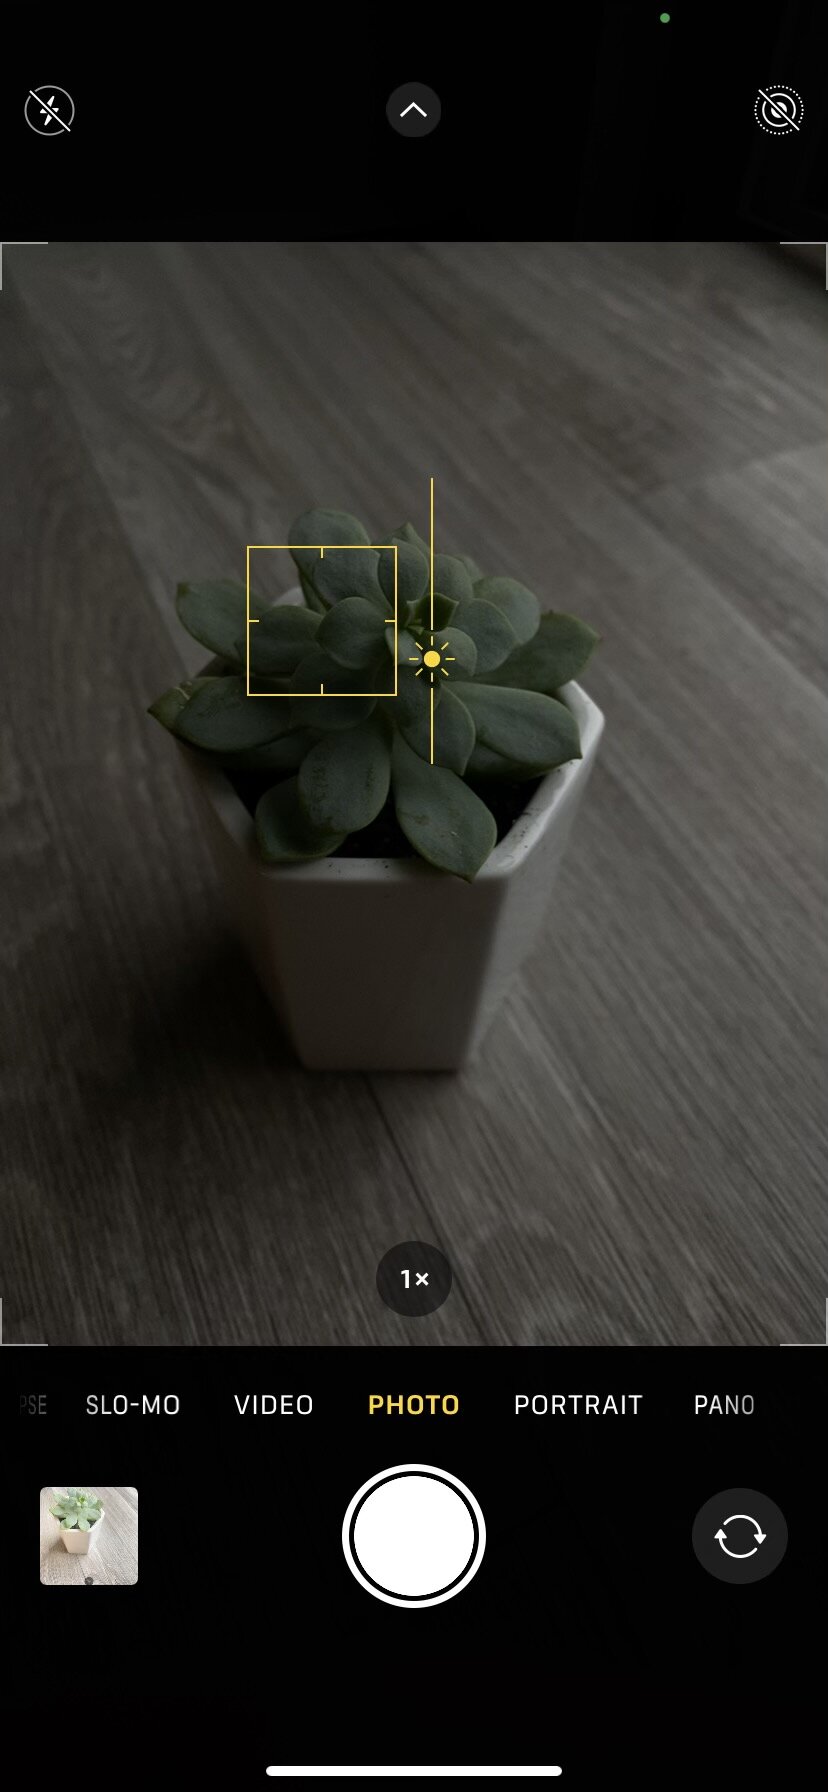
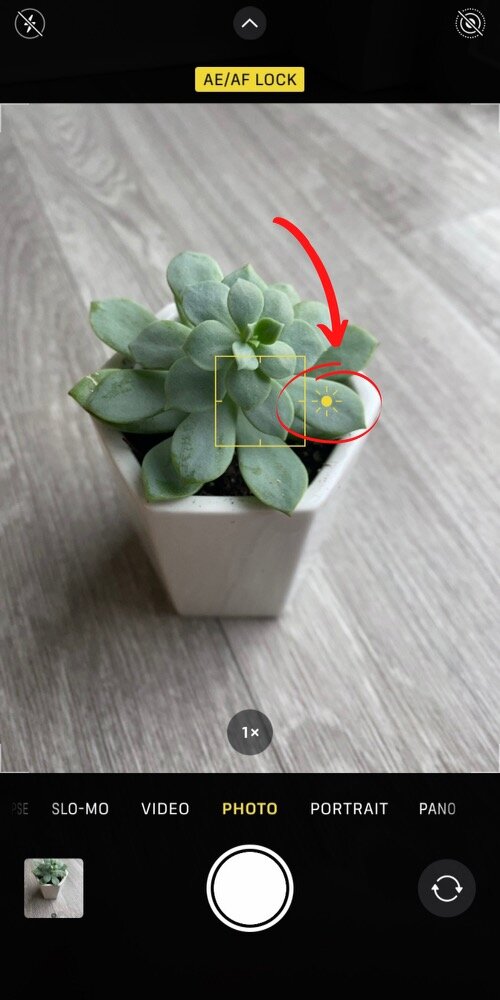
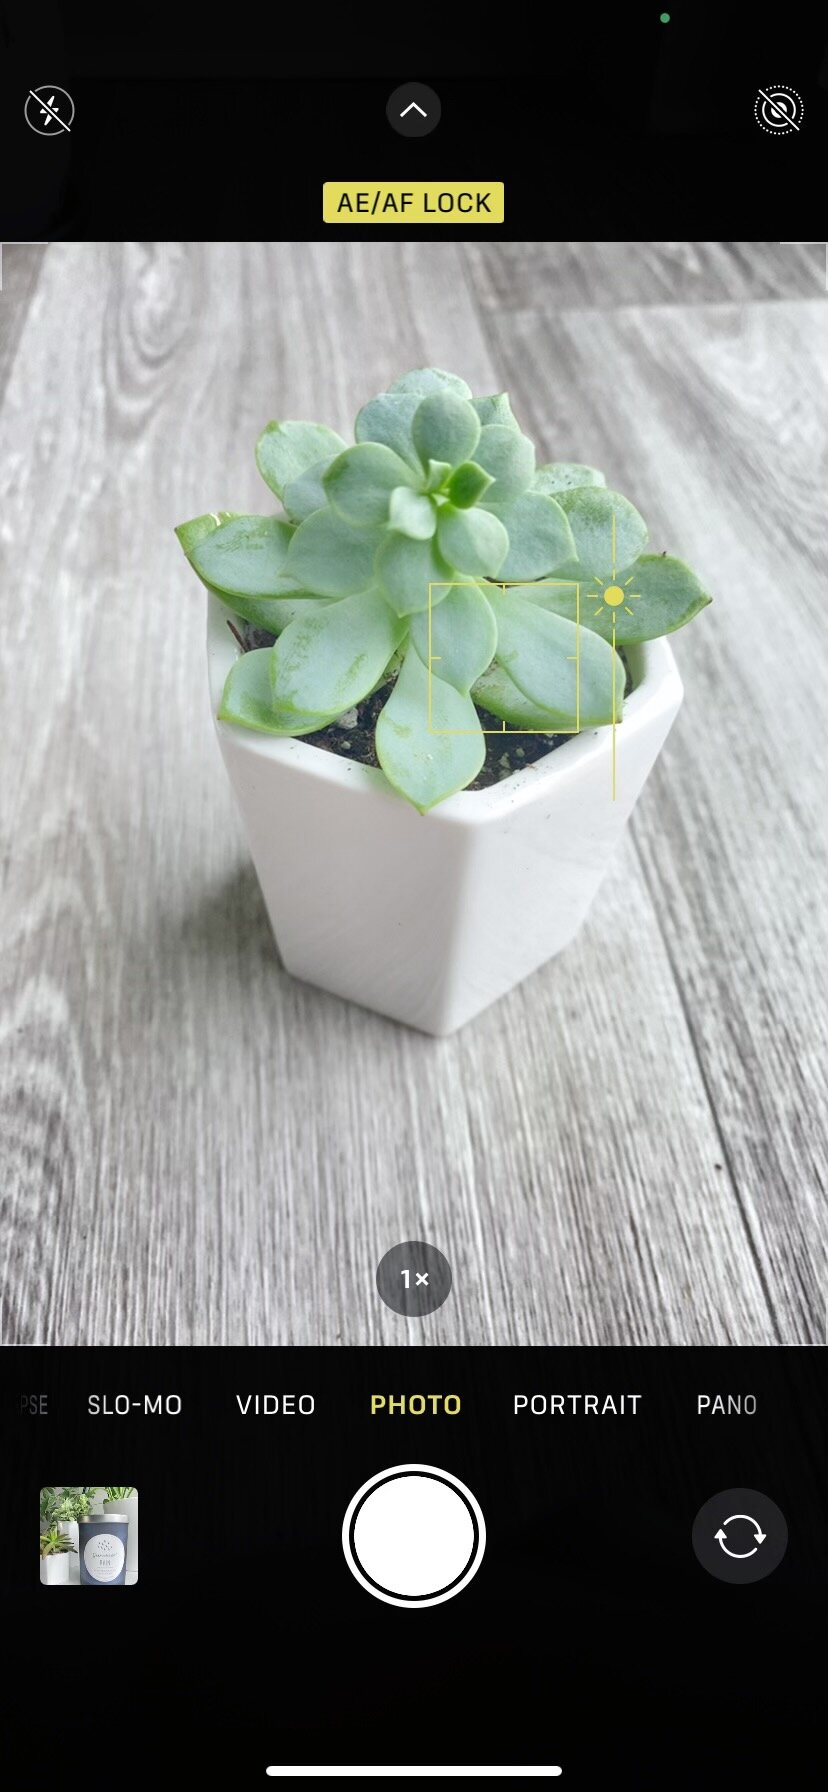
2. Lock in your focus
Have you ever gone to take a photo and for some reason your camera decides that the tree or bush behind your subject is what it needs to focus on, thus creating a photo that looks blurry? To avoid this you can actually lock the focus of your camera on a certain part of the image!
All you have to do is press down on the part of your photo that you want to be in focus and hold for two seconds. You will then see a “AE/AF Lock” graphic that will pop up just above the area you chose.
This means that your phone has locked in on that part of your photo, keeping your subject in focus even if you accidentally shake or move your camera while taking the photo.
You can also use this feature to experiment and get more creative with the angle of your camera placement. Once you’ve locked your focus on your subject, you are free to rotate the camera to your liking to get the exact angle you were looking for without having the camera re-focus or have trouble focusing on subject you’ve chosen.
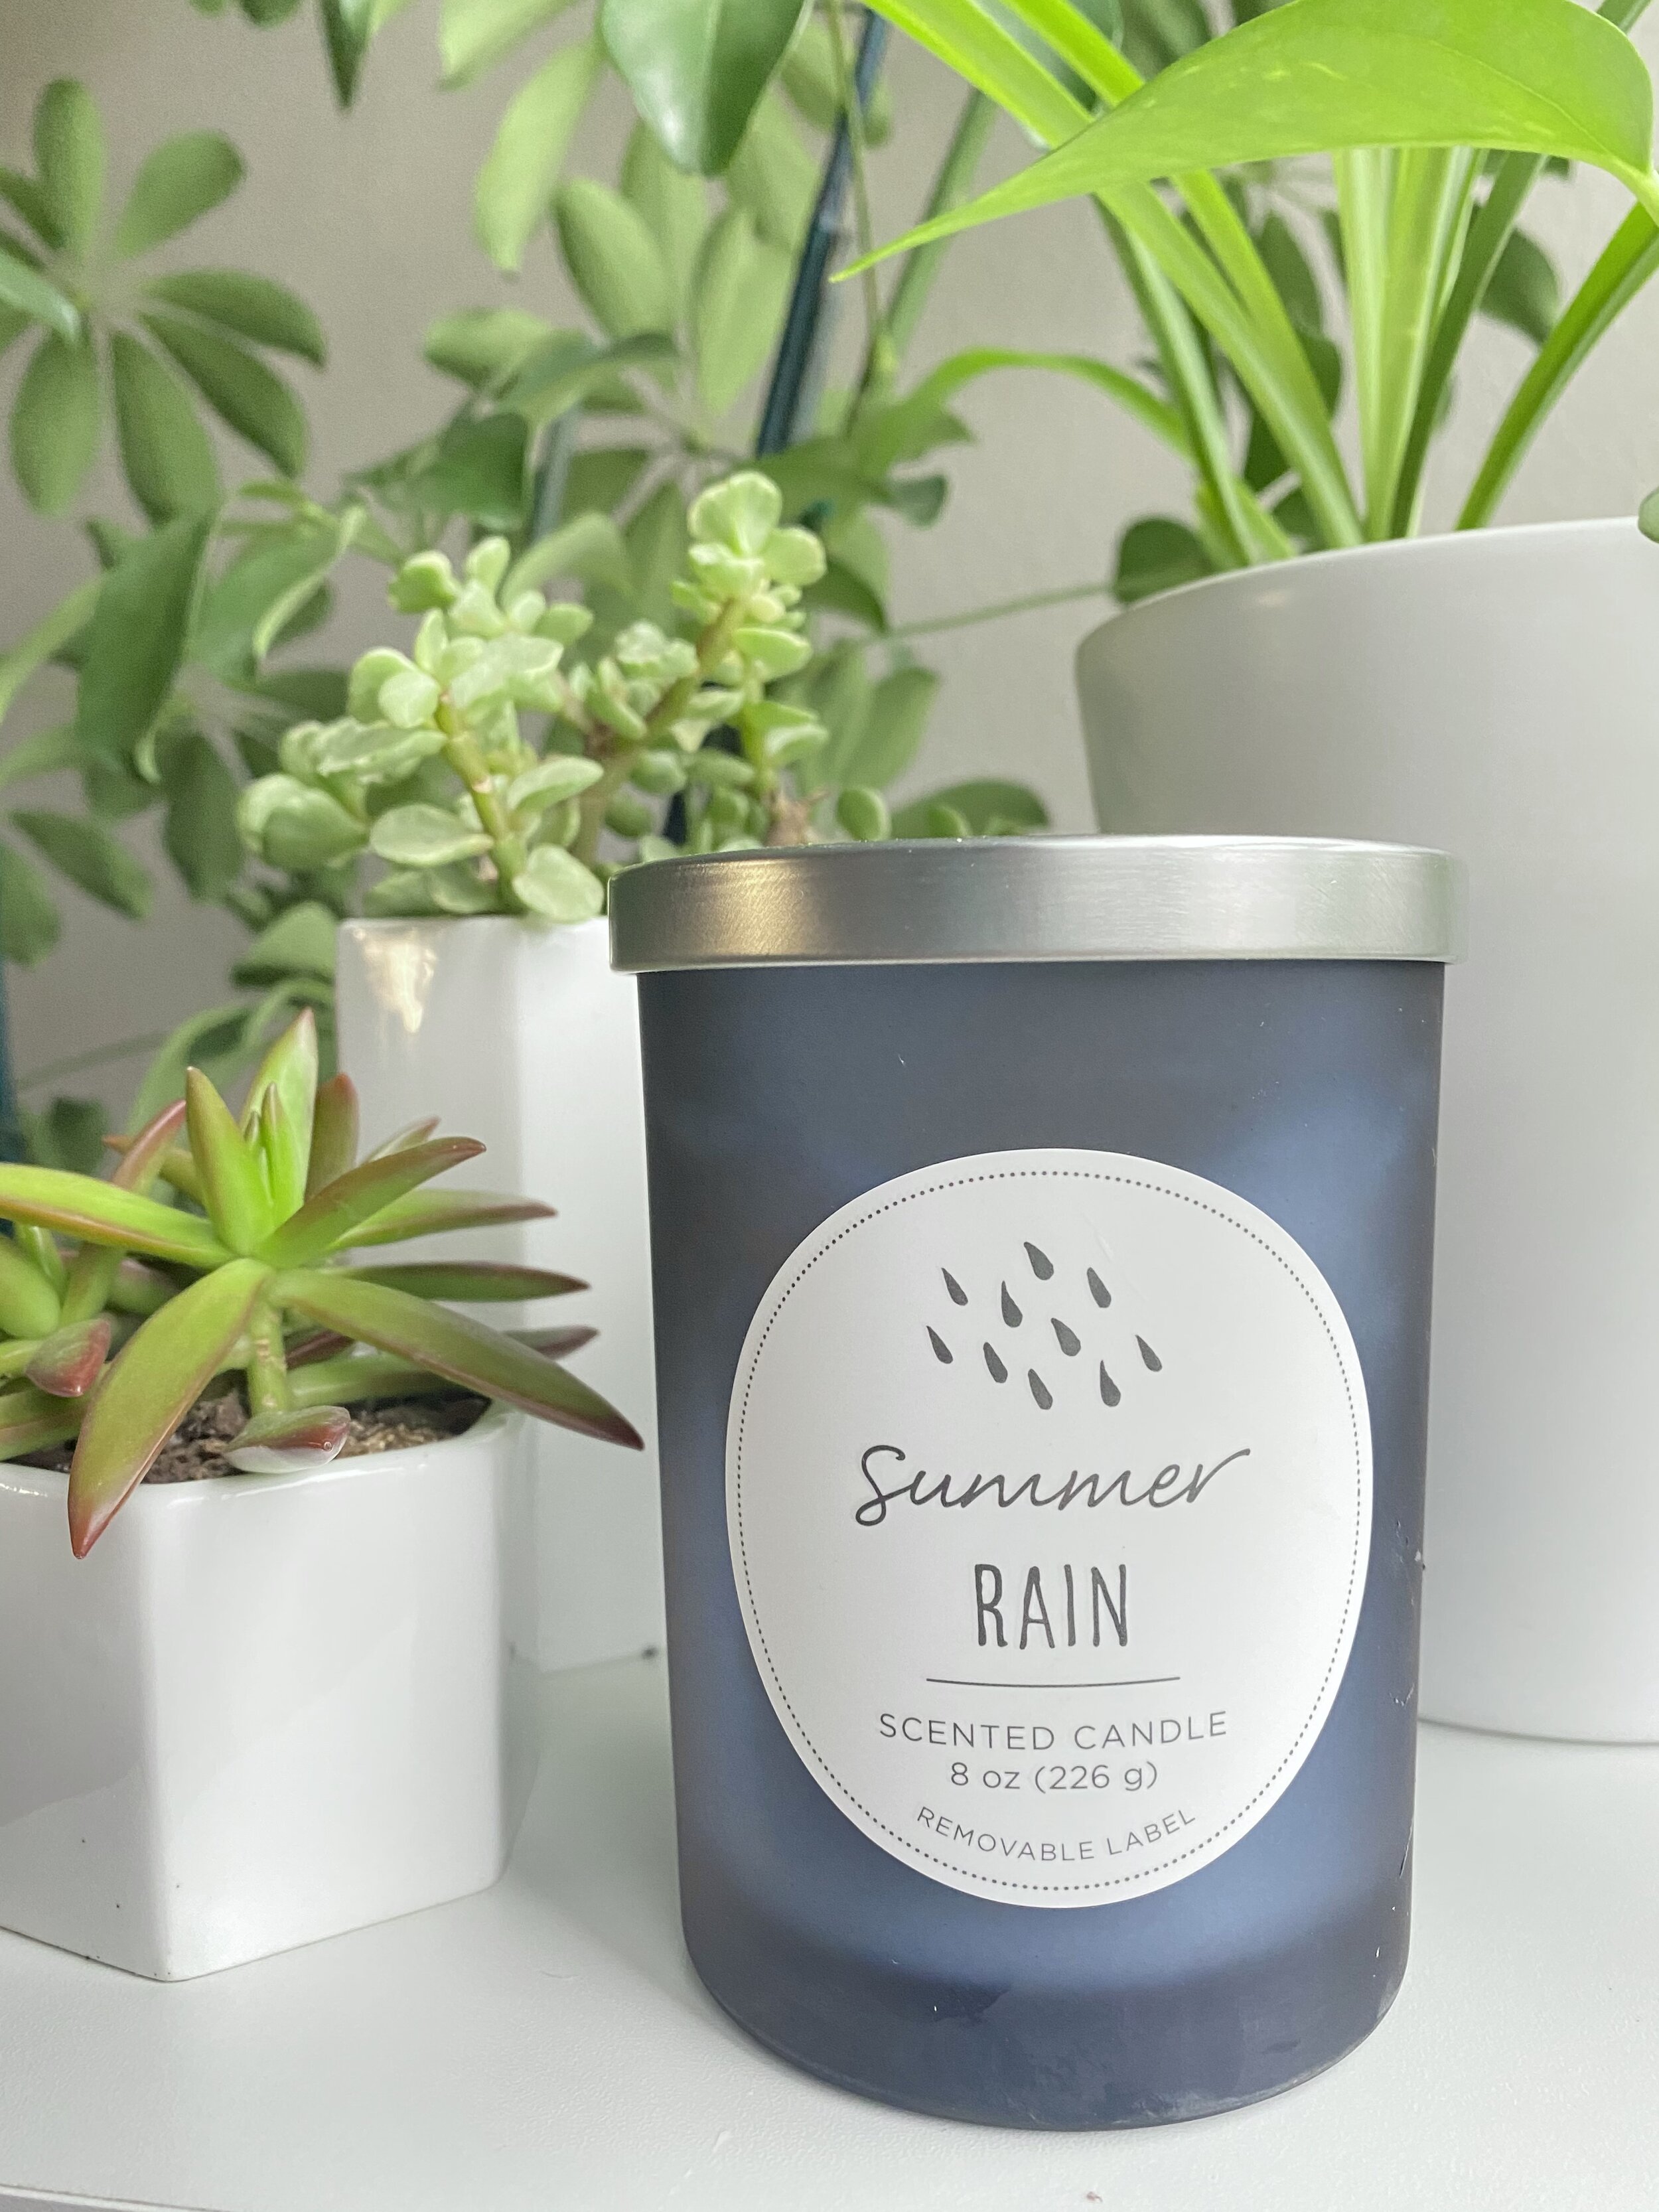
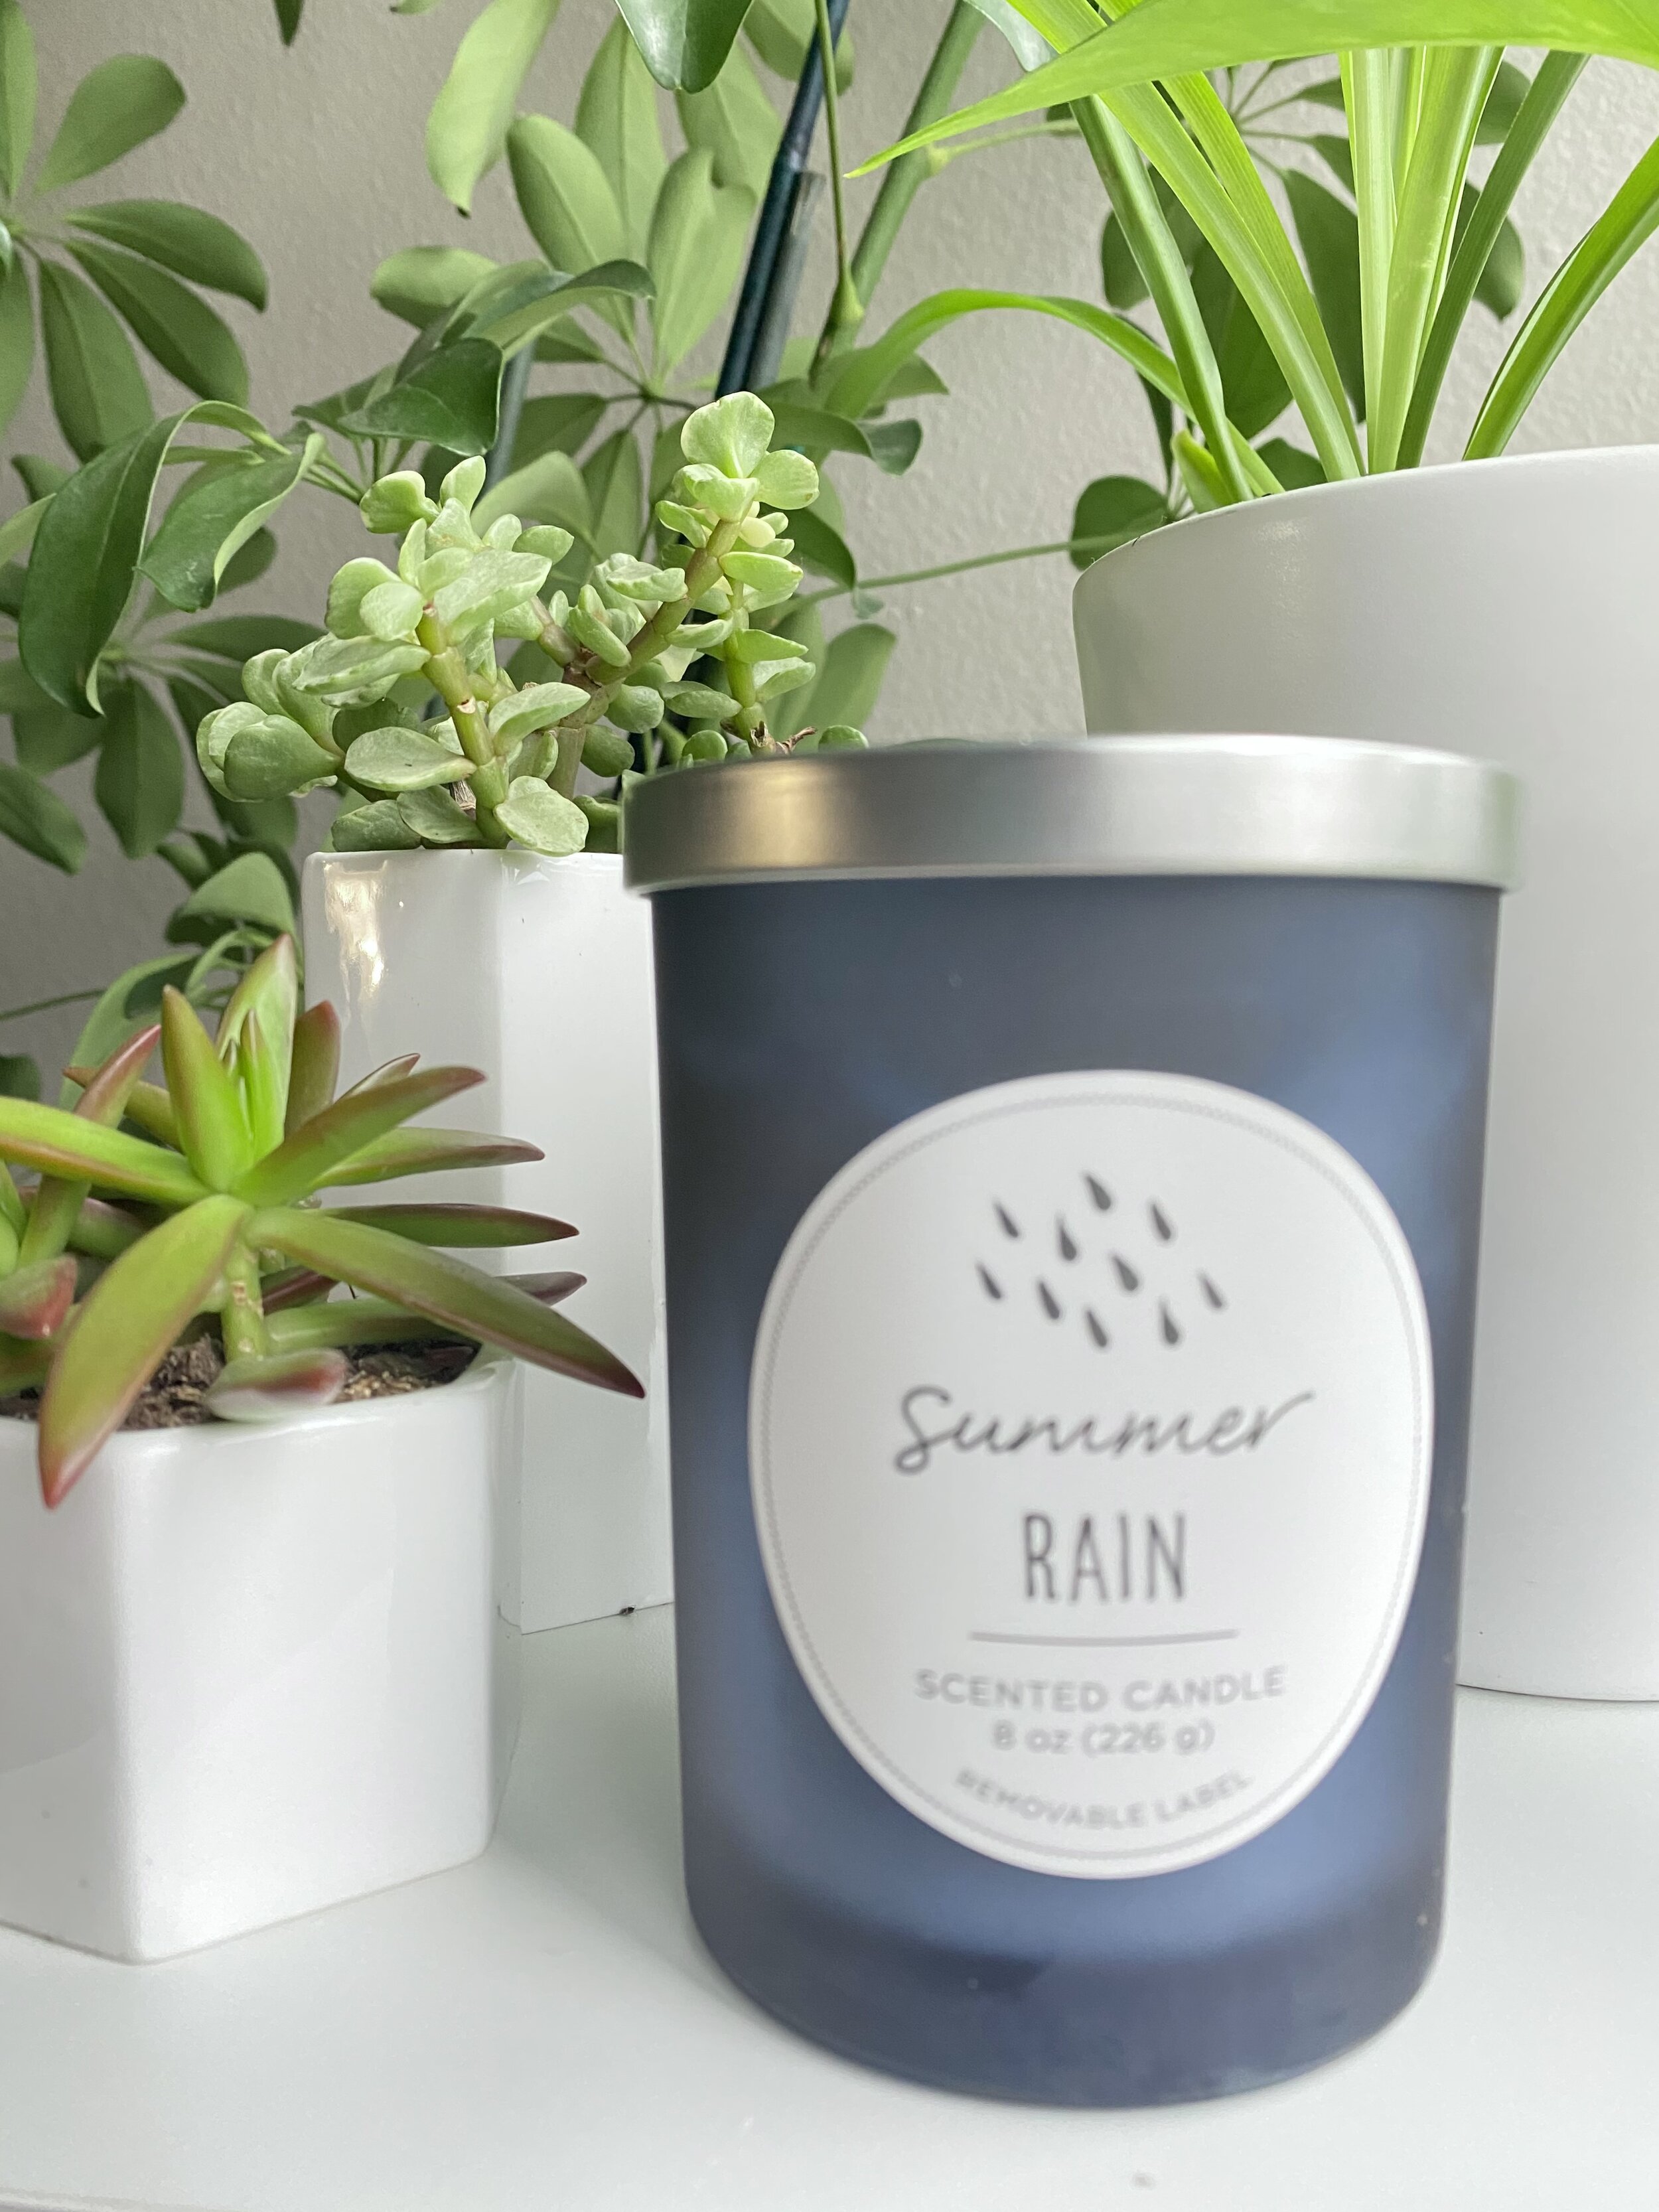
In the above photos you can see that in one of them the candle is in focus and the other the succulent is in focus.
My phone automatically chose the succulent even though I wanted the candle in focus.
Using the AE/AF lock I was able to manually choose the candle as my main focus point.
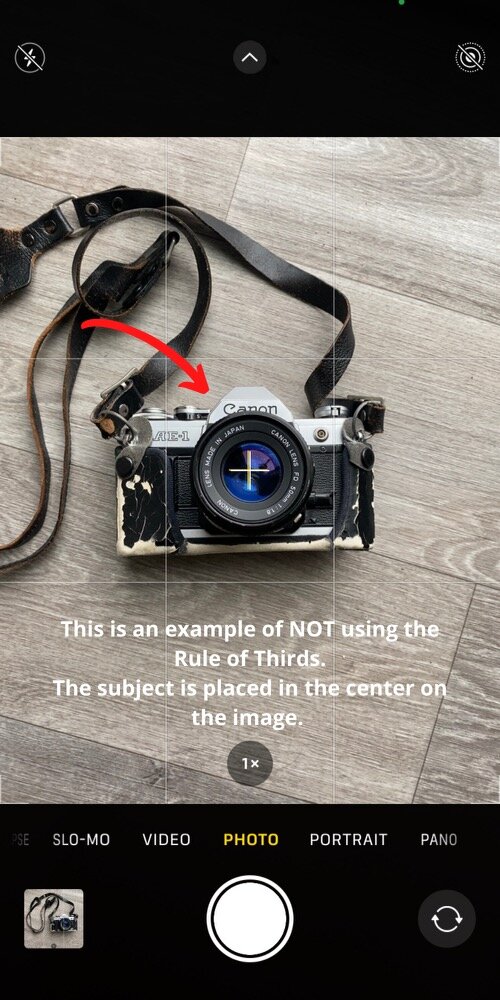
3. The Rule Of Thirds!
One of the easiest ways to take your photos up a notch is ensuring the most aesthetic placement of your subject within your photo.
The “rule” behind knowing where this location is is called “the rule of thirds” and states that if you drew imaginary lines dissecting your photo into thirds (two evenly spaced horizontal lines and two evenly spaced vertices lines) the best placement for your subject is on one of the four intersection points of those lines.
See example below:

It’s not always easy to visualize these lines however, so to help you out you can change your phone’s camera settings to show you these lines for reference when you snap your pics.
To do this on an iPhone, launch the Settings app from the Home screen and tap on Photos & Camera.
If you toggle the “Grid” switch it will enable a compositional grid to appear on your camera screen when you’re using your phone’s camera. These lines are just for reference, and won’t show up in your final image.

This is a great tool to have while taking photos in order to easily visualize whether or not your subject is on the rule of thirds intersection points or not!
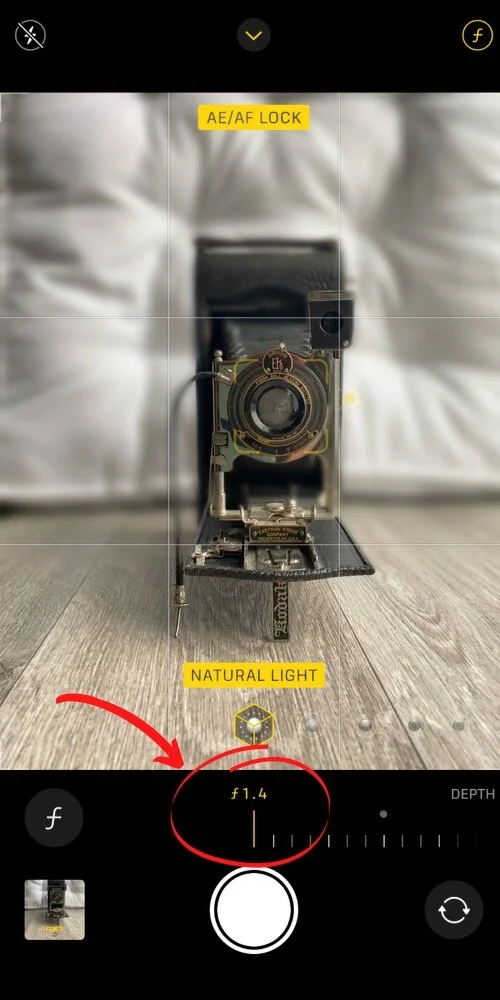
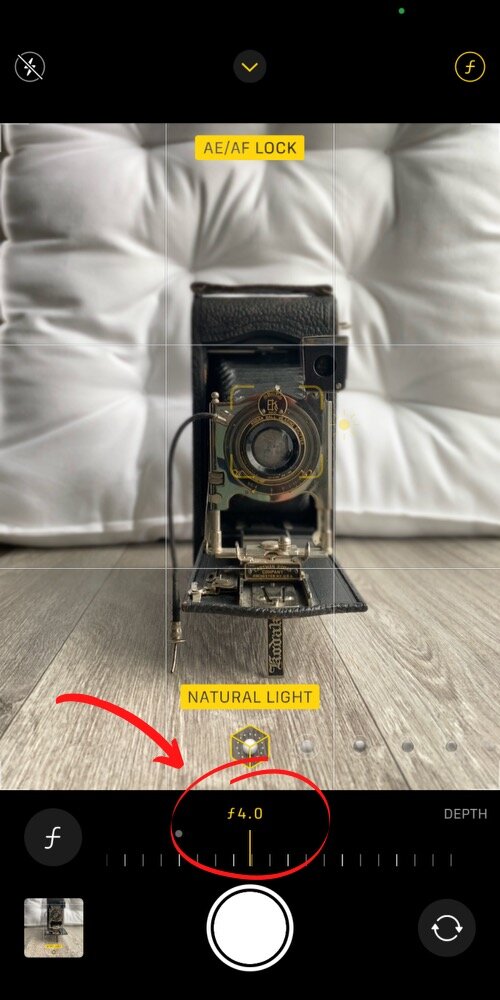
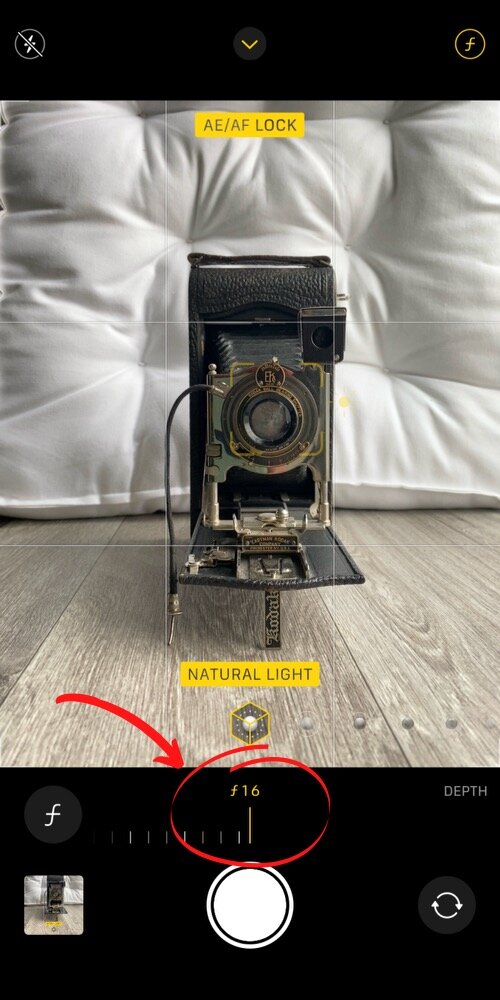
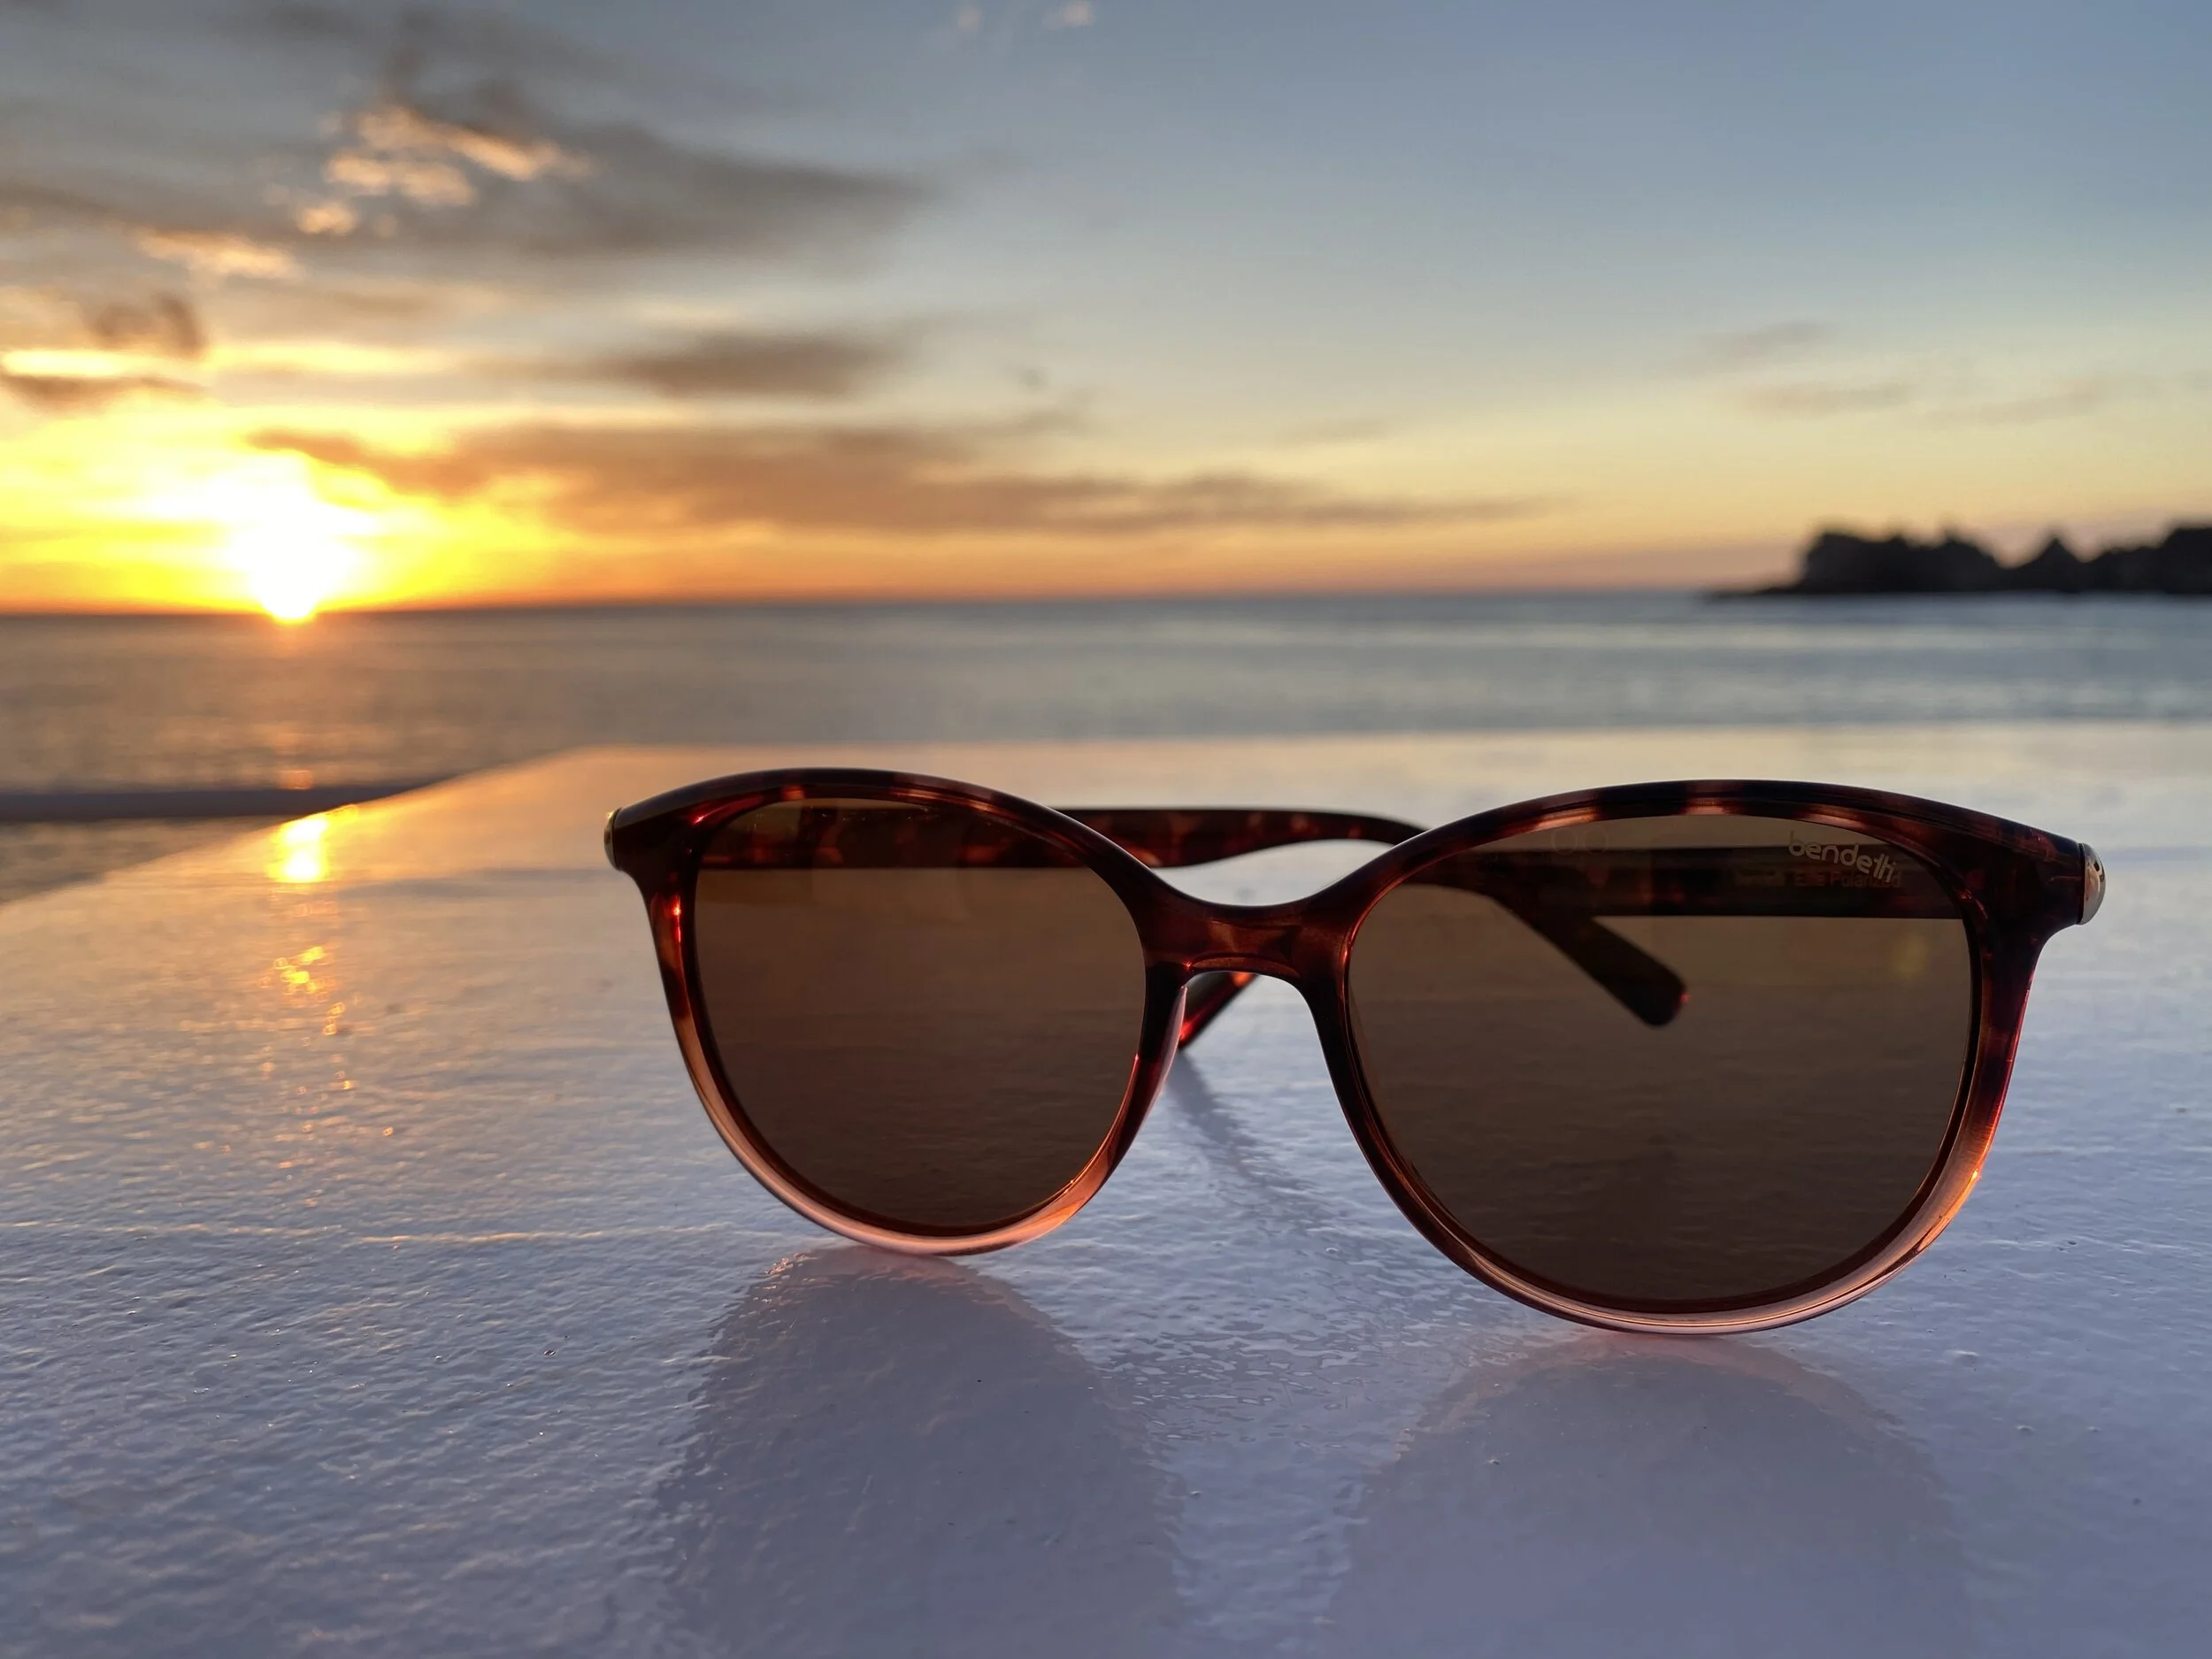
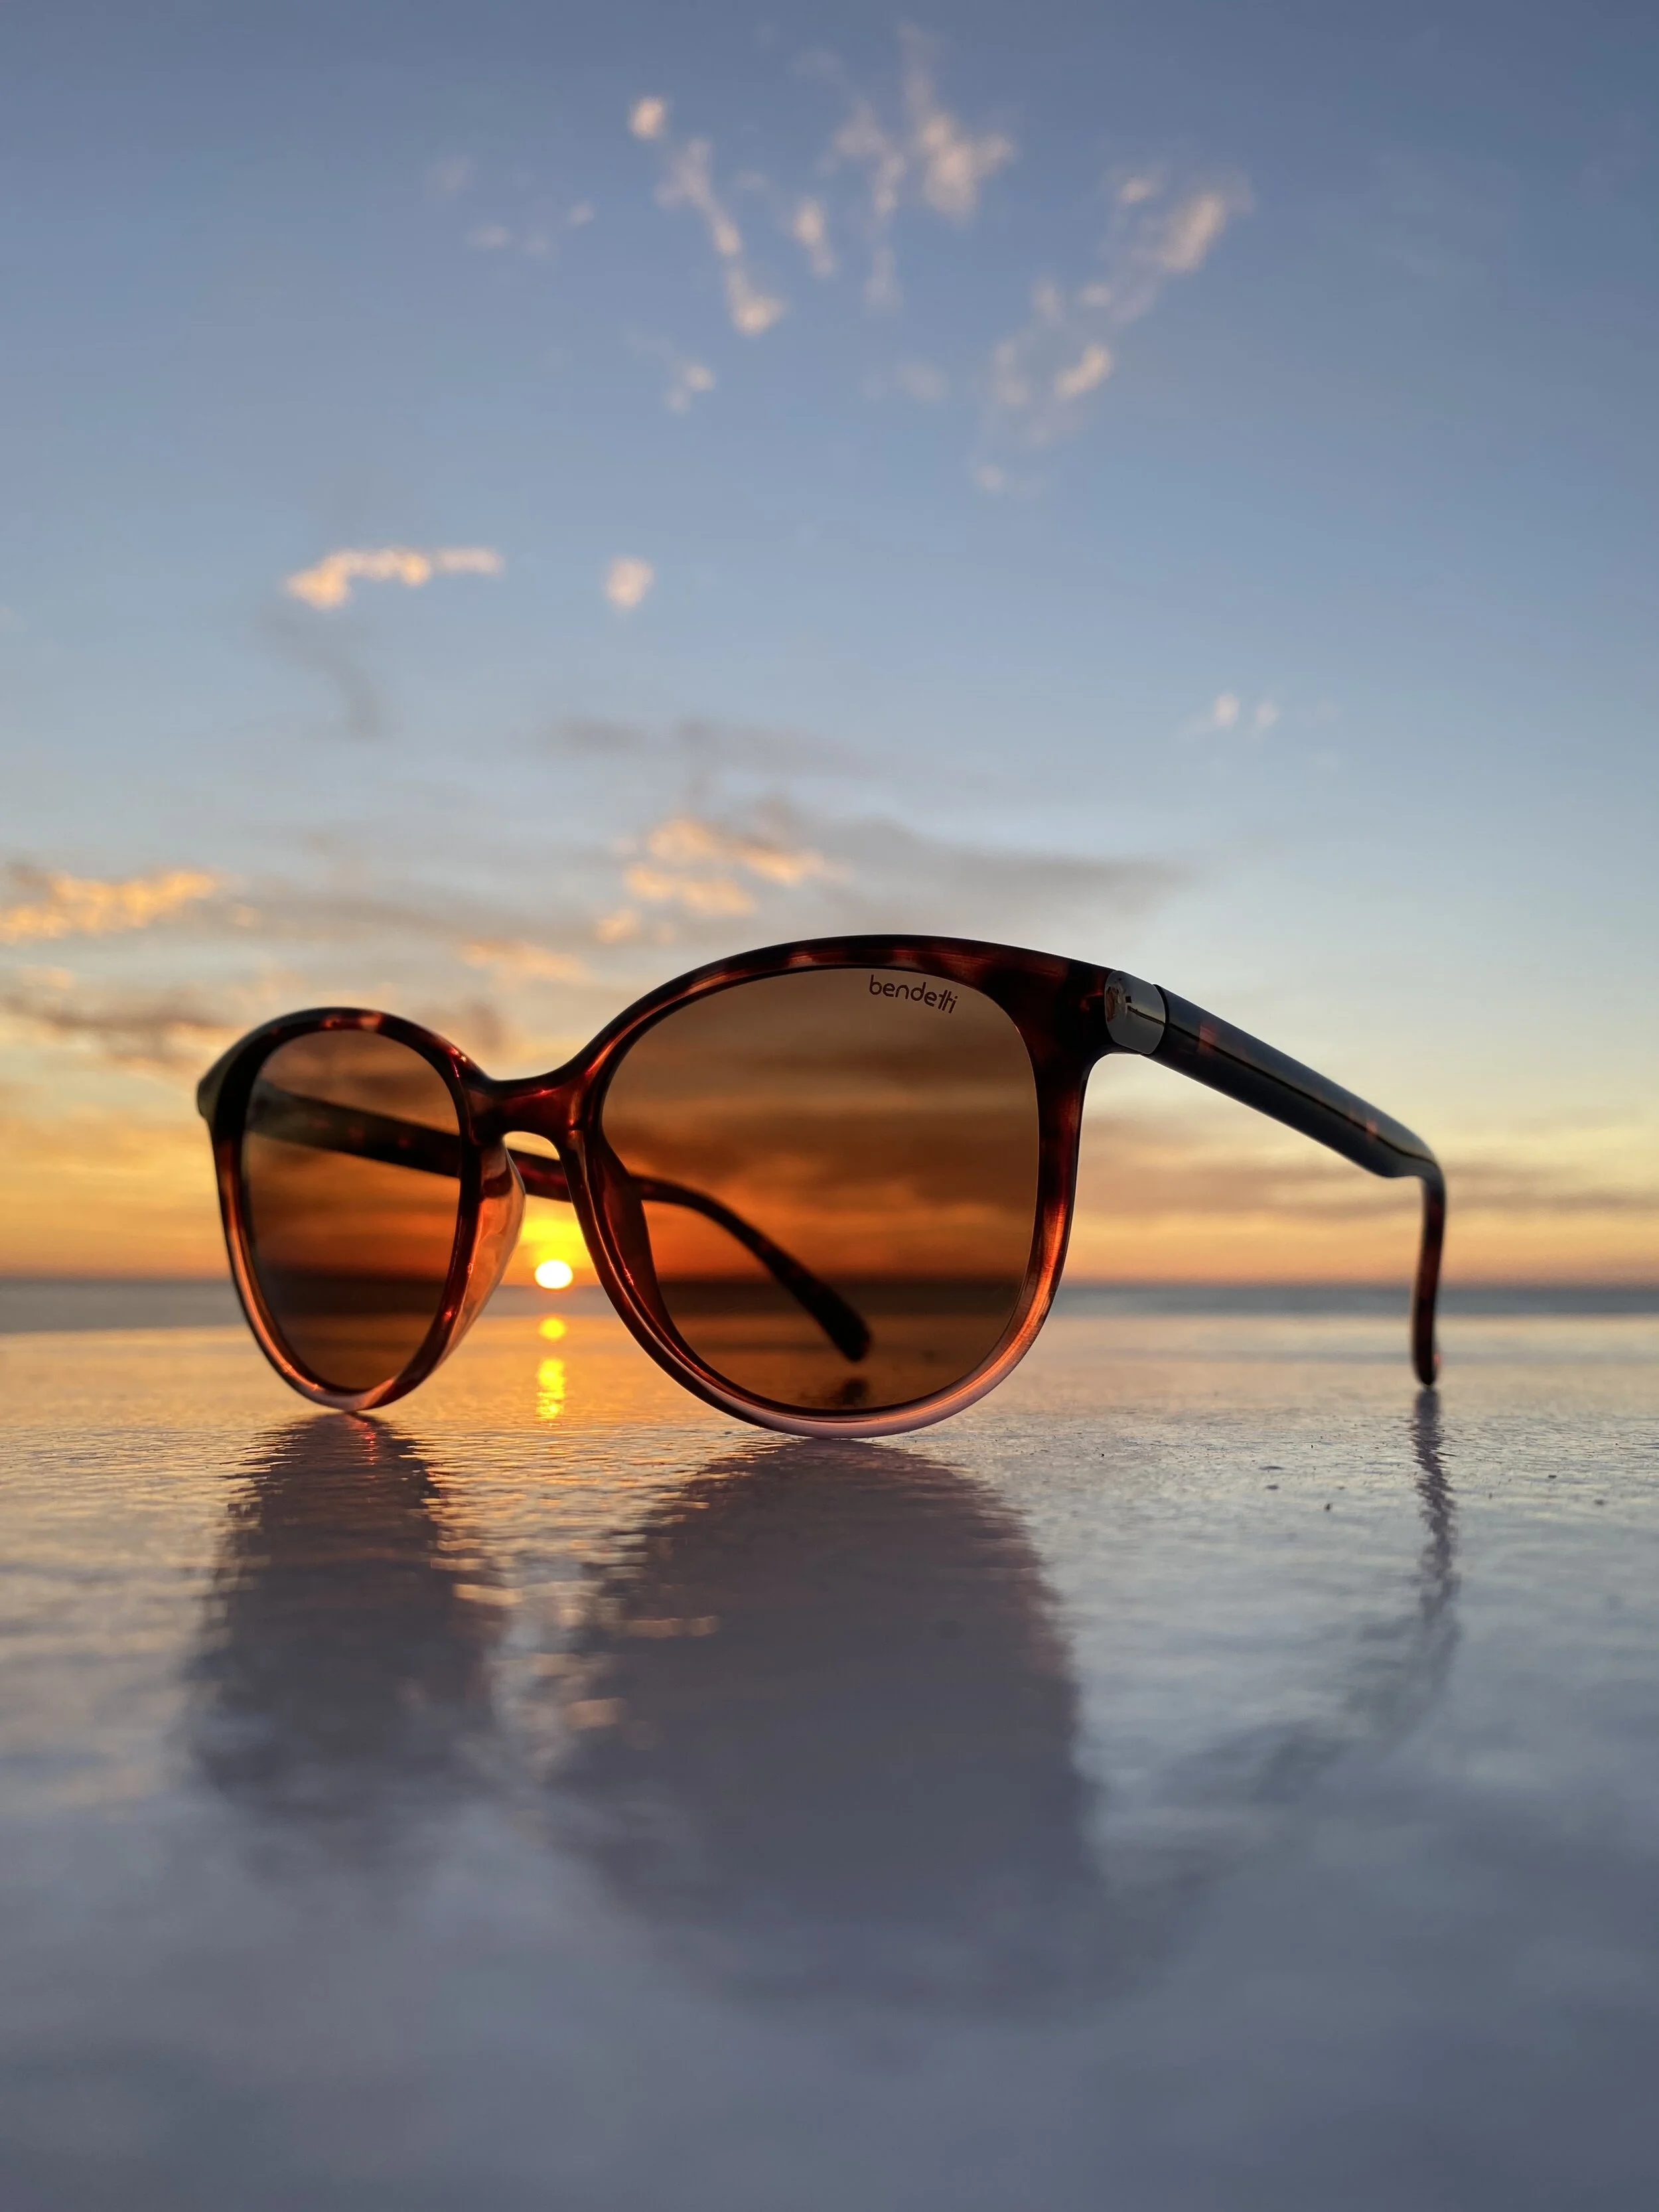
4. Experiment with “Depth of Field”
Being able to adjust how much of your image is in focus or not is a game-changer when it comes to using your phone to create portraits, focus on a singular object, or capture more detail in landscapes.
This option is called controlling the “depth of field” of your image, and is measured by numbers small to large.
On an iPhone, you will need to be in “portrait” mode to adjust this. Once you are in portrait mode, click the little white arrow in the middle of the top bar. By clicking this arrow you’ll find a selection at the bottom right of your screen that is a lowercase “f” (Depth of field is measured in numbers called “f-stops”). Clicking on this “f” setting, you’ll see you can adjust the number from 1.4 to 16. The lower the number the “shallower” the depth of field, meaning only your subject will be in focus and everything in front of, and everything behind your subject will be out of focus. This is especially beautiful when taking photos of people, or making more dramatic photos of products.
(See example below)
If you put the “f” setting to a higher number, the things closer to your camera, your subject, and things father away from your camera that are behind your subject will all be in focus, so this is a great setting to use for landscape images!
5. Turn your phone upside down!
Change the look of your photos by quite literally, changing your camera’s perspective!
On most phones, the camera lenses are located in the top right corner which means that even when you bring the overall height of your phone down, it isn’t quite in its lowest vantage point.
By flipping your phone upside down you move the camera to it’s lowest possible location which can create some really dramatic photos of products or get a totally unique perspective!
Example:
In one photo I shoot landscape and the other I have my phone upside down.
Can you tell which is which?
6. Choose the best light for your subject!
Being intentional about where your subject is in relation to any natural light you have available can make a big impact on how your photos turn out! If you are inside, look for a window to light your subject with, making sure you don’t place your subject between the window and your phone camera, as this will cause your image to turn out hazy and your subject dark.
Instead, have your subject next to the window, with the light hitting half their face, or stand with your back to the window and your subject facing the window behind you for even and beautiful lighting.
If you are outside, face your subject toward open patches of sky rather than facing dark trees or dark structures.
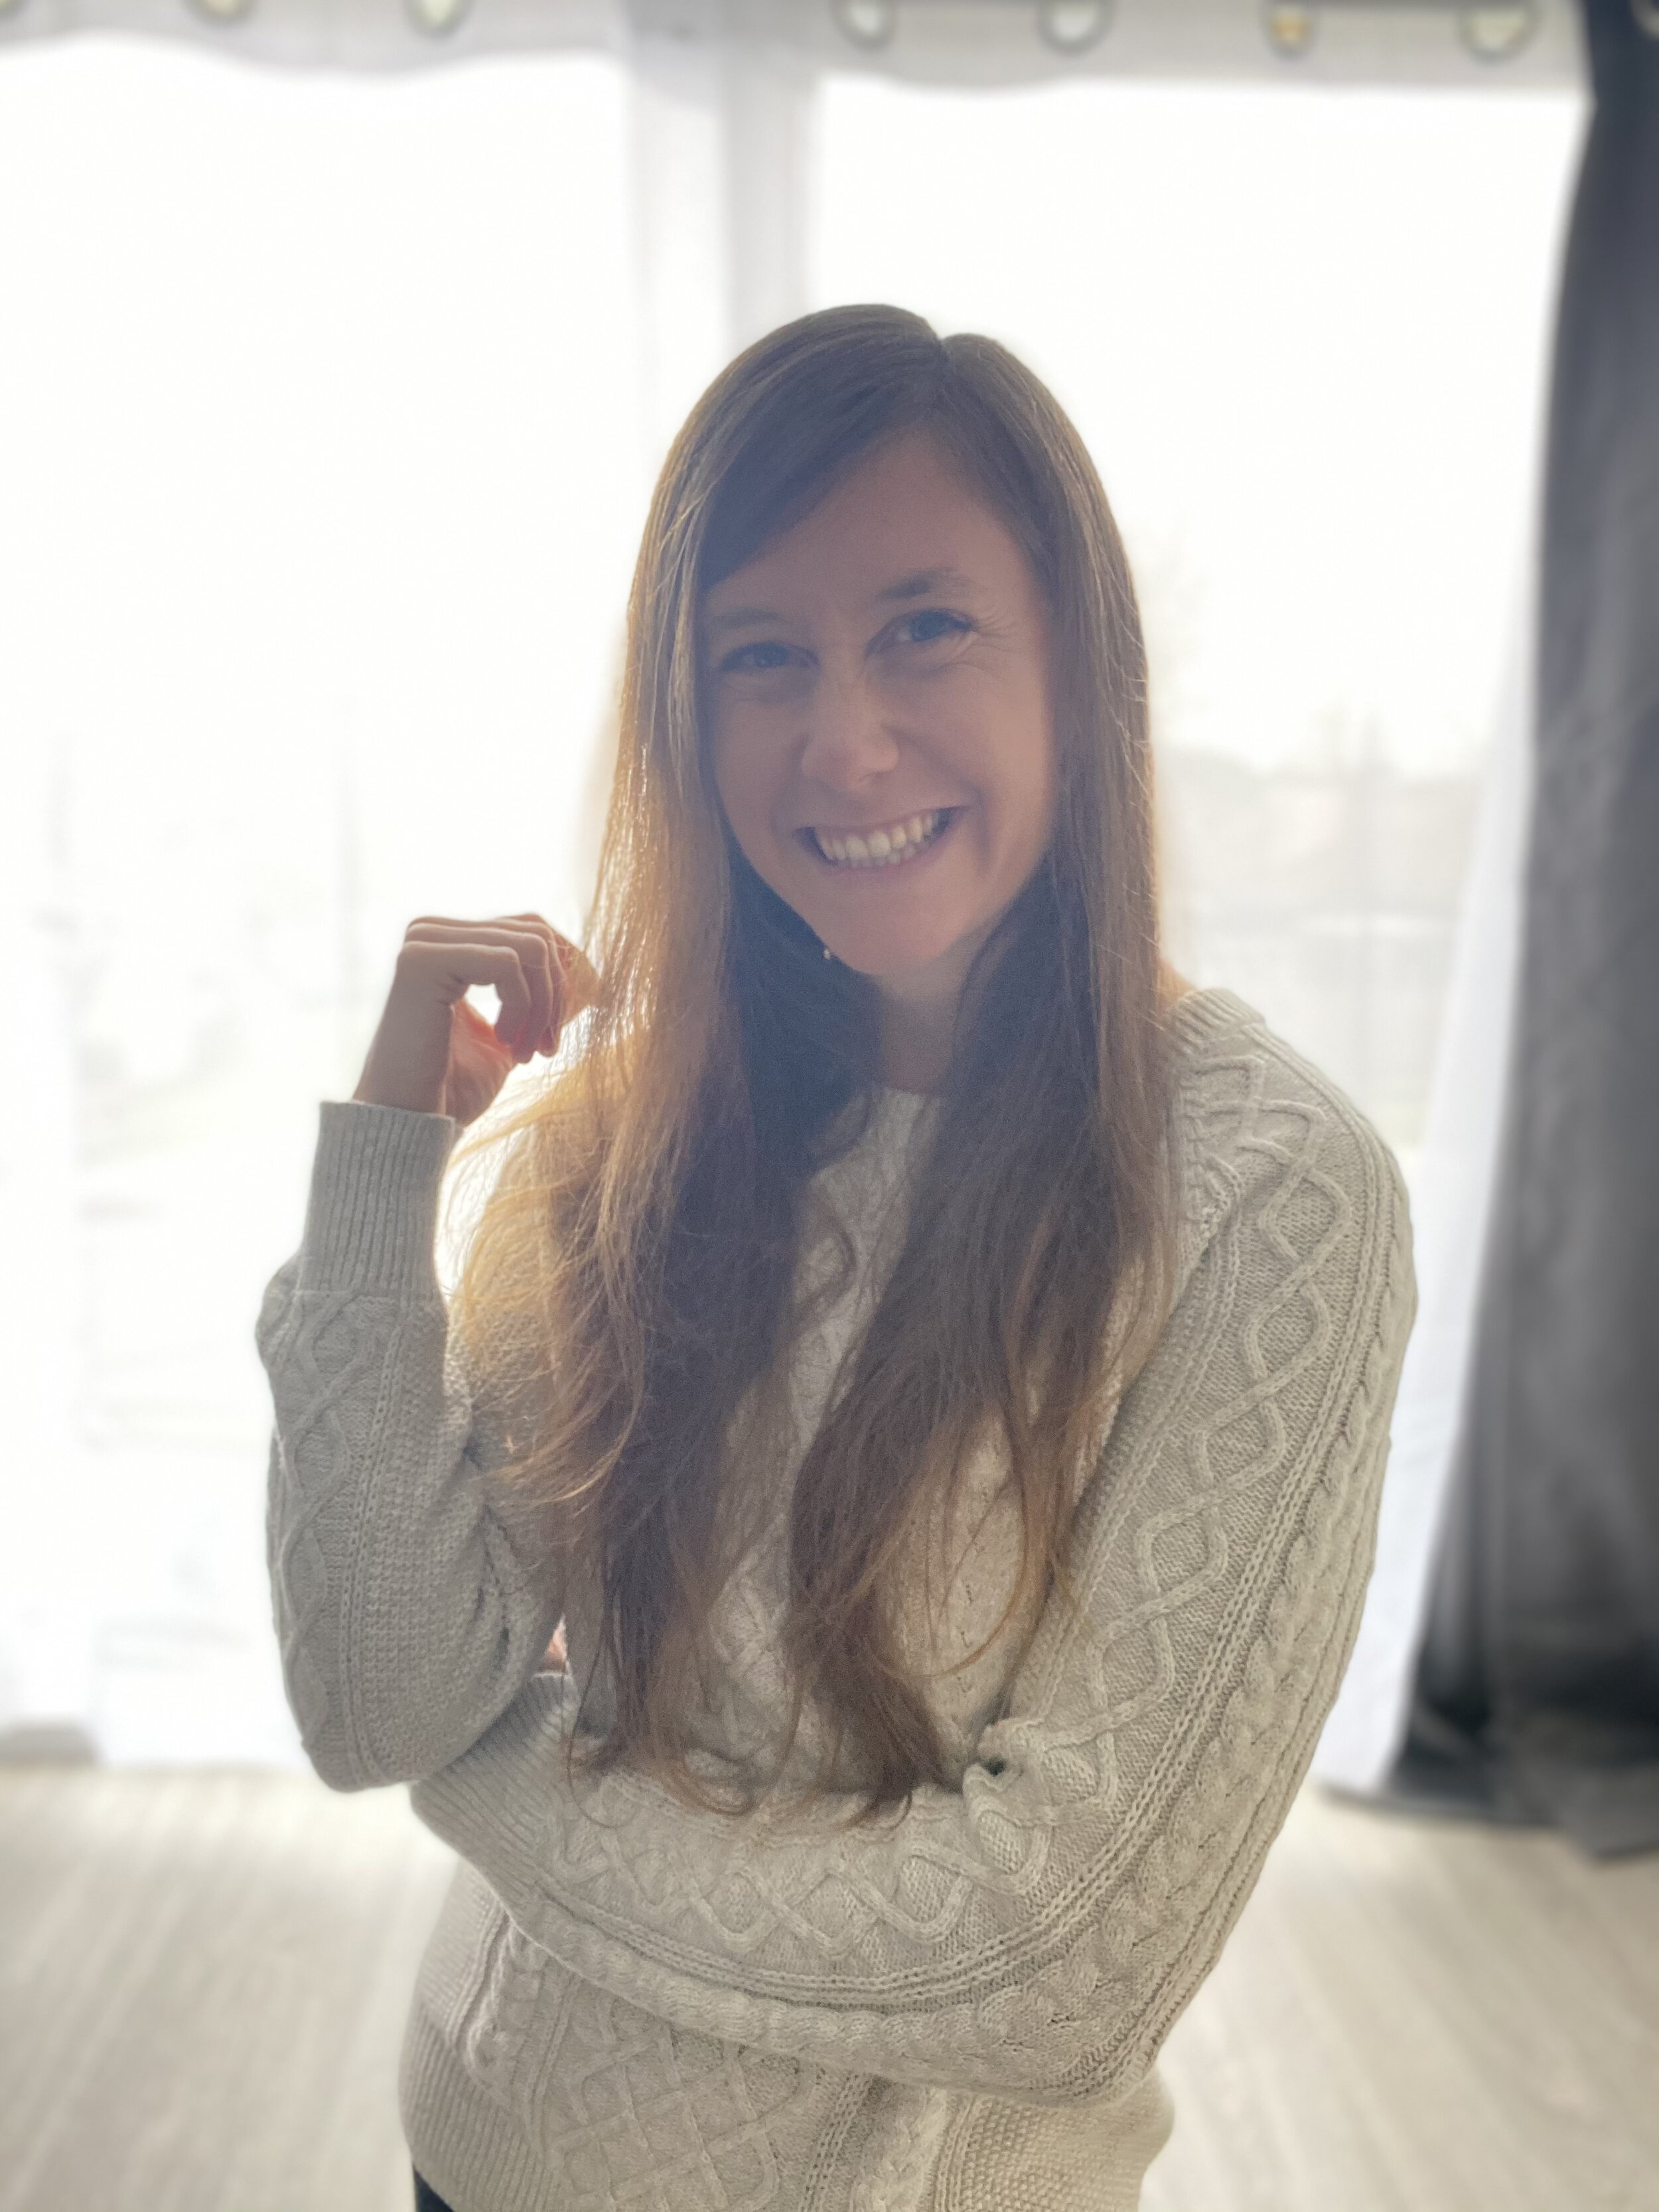
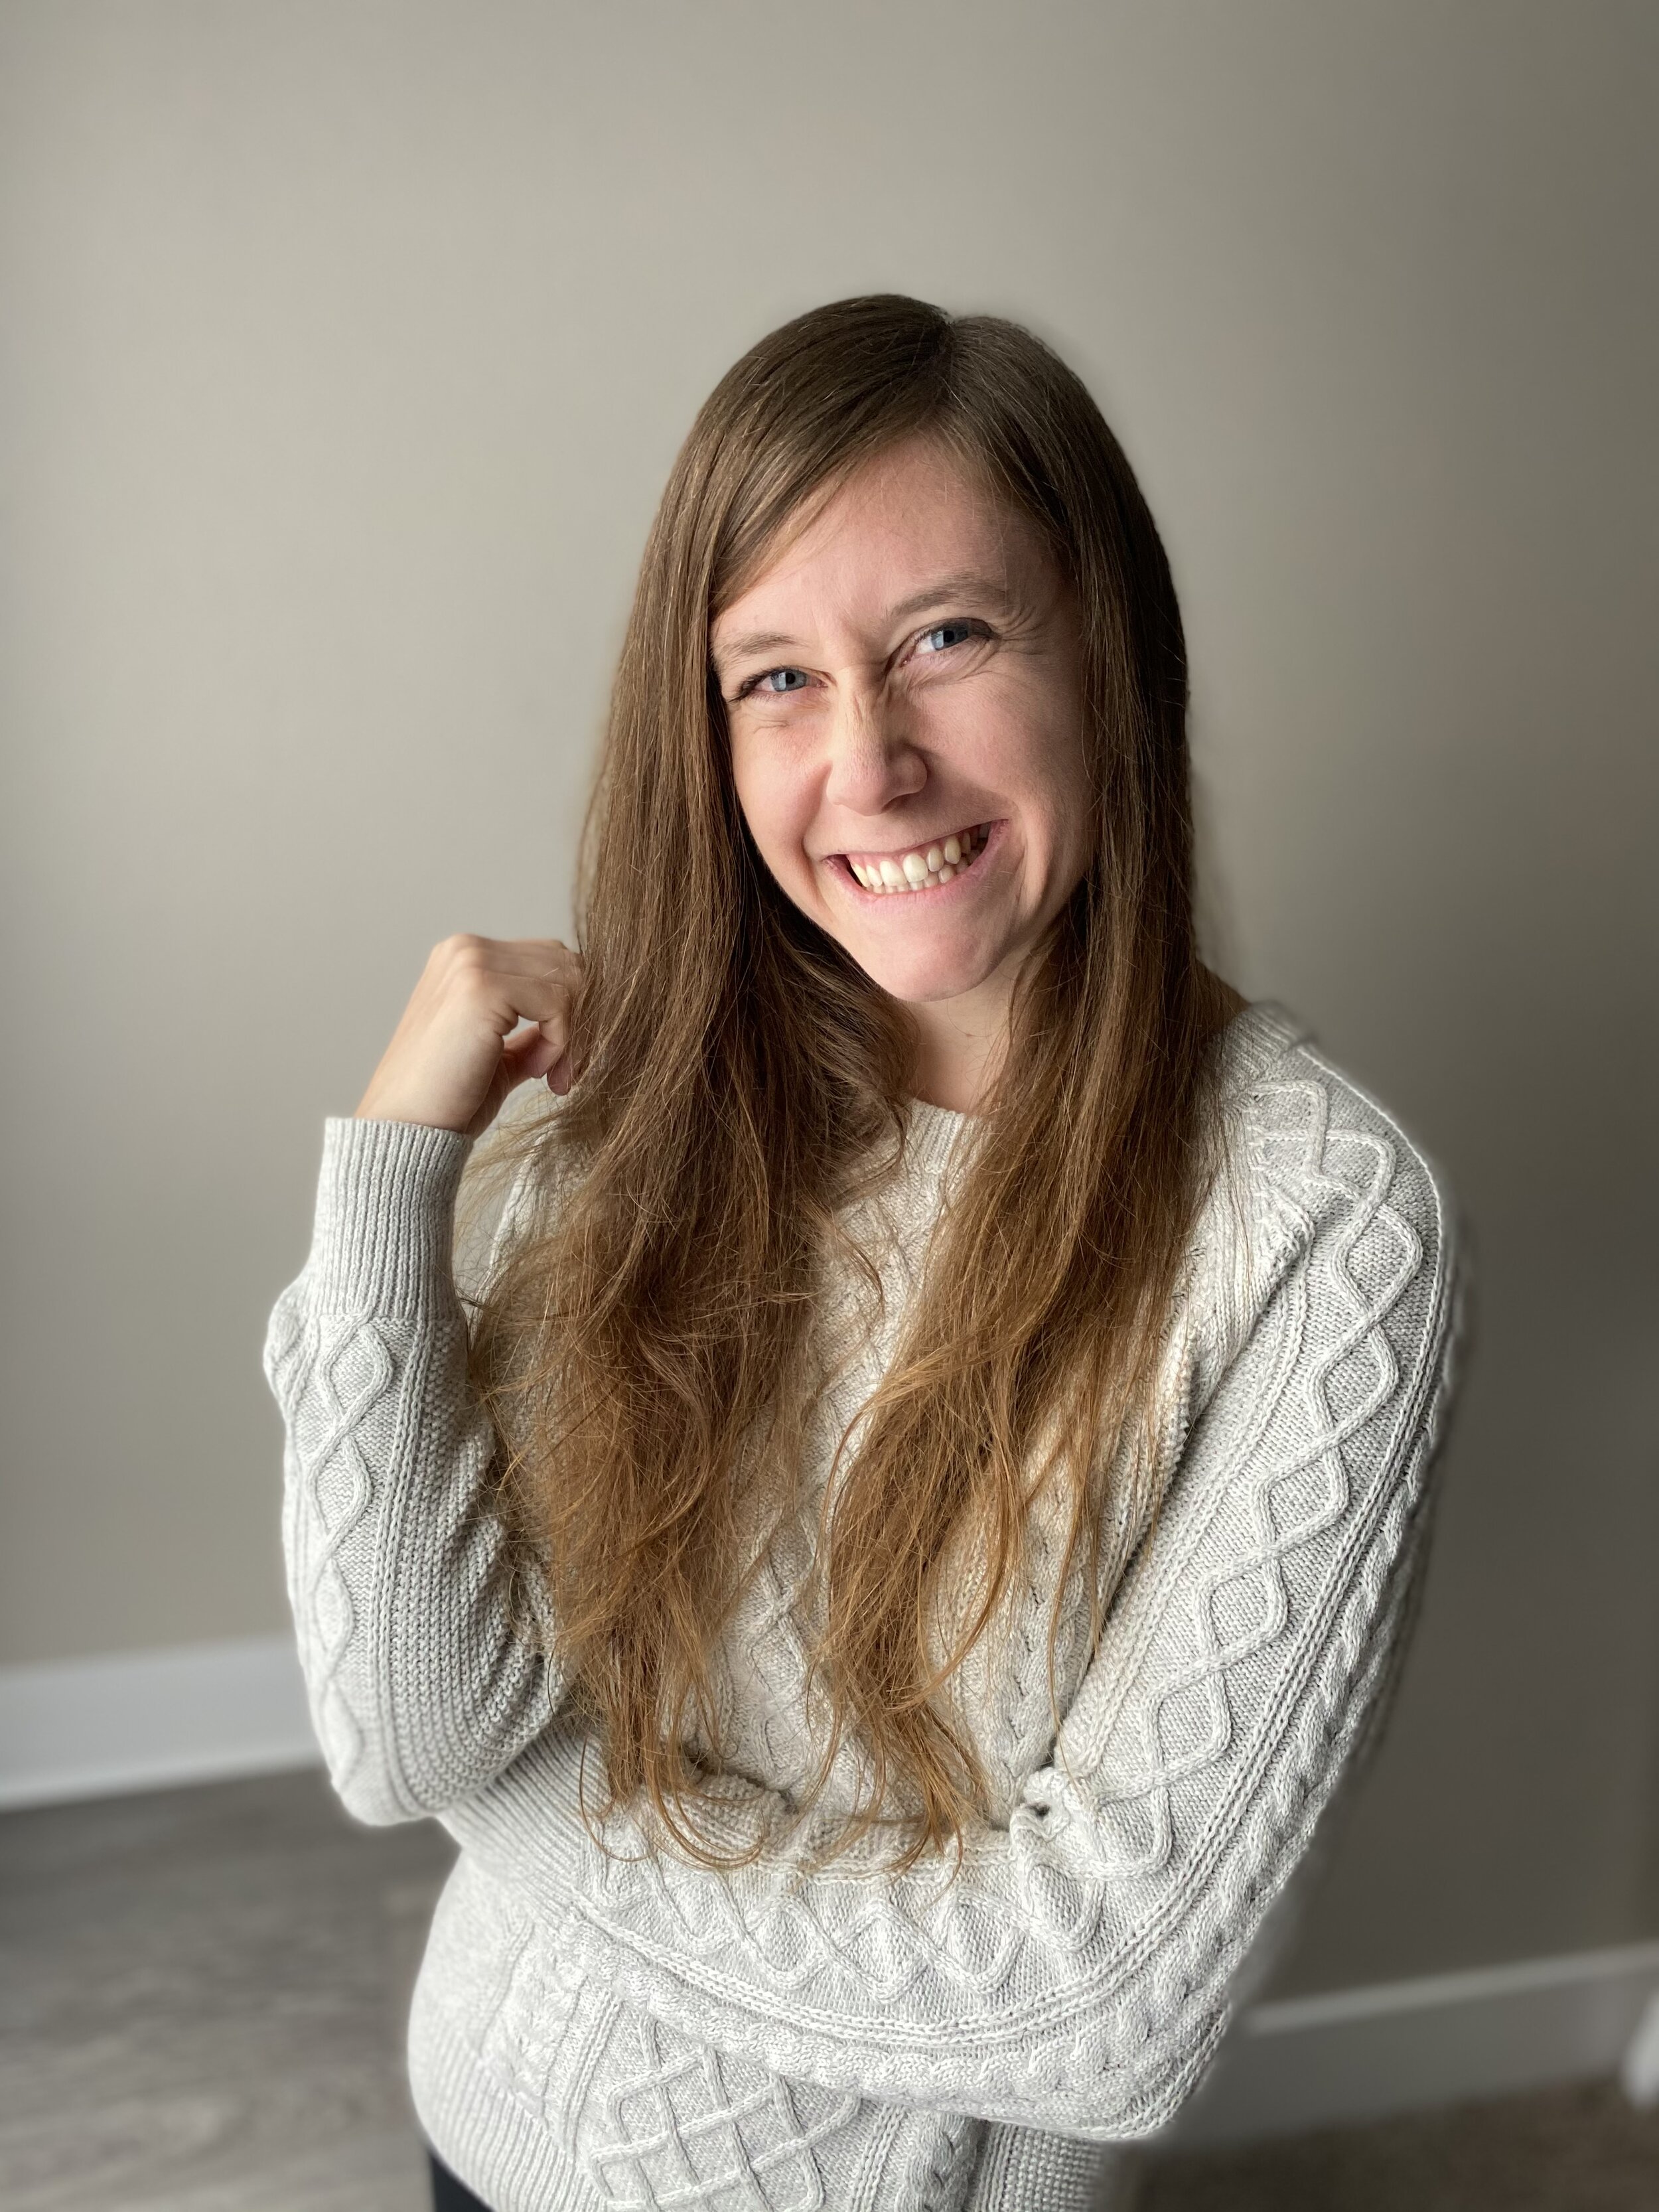
The two photos are extremely different!
Can you tell which one is shot directly with the window behind and which one I am using the window light to my advantage?
I hope you enjoyed these tips, give them a try the next time you bust out your camera for a photo, I guarantee it will take your images up a notch!